
 I took myself on a field trip to a class at the Torpedo Factory in Alexandria tonight to try to get a visual understanding of traditional printing techniques. Master Penny was gracious to explain the differences between Lithography, Offset Lithography, Etching, Photogravure. I was trying to understand the technique, for my own curiosity as well as discern if traditional printing could be a way to print my drawings, for a hand-made feel, the impression of ink on paper by sheer force rather than inkjet. I am seeking a way to print in a tradition that shares history with the types of drawings I am making, that preserves an honorable art, that is more tactile.
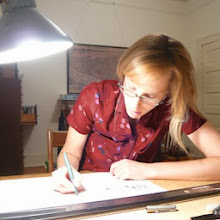
I watched two students laboriously and methodically make a lithographic print: rolling the oversized brayer back and forth through the almost-dry black ink puddle on the table, then five times over the illustrated stone, then ink, then stone, then ink, then stone. Fresh paper on the inked stone, scratch paper for padding, top cloth. Set the large metal handle of the large metal roller, then rotate the handle and guide the stone down the table and under the essential weight of the roller to push the ink from the stone to the paper in just the right proportion.
The machines and the stones were made and used in the 1800s. The drawing is produced, backwards, on the stone's surface, no engraving, with a variety of fountain pens feeding a special greasy ink. The greasy ink holds the printing ink as it is rolled over the surface and imprints the paper when pressed. The stone I photographed (above) shows the backwards drawing and epitomizes the level of detail that can be achieved with fine point greasy ink pens. When litho printers closed shop in the later 1900s, stones were thrown in the river. These are very heavy and hard to come by these days (so are the presses.) When a stone is put out of commission, it is recycled by grinding the drawn image from its surface through a series of granular concoctions rubbed over the surface increasing from relatively coarse to the finest granularity, like sandpaper without the paper. Then a new drawing can be created on the stone.
A description of the Process of Lithographic Printing can be found on the internet but seeing the prints was essential to really make an impression, for me. Kind of like the difference between inkjet and hand press.


1 comment:
What a beautiful land! So glad you are taking the opportunity to uncover many treasure above and below ground AND sharing them with us.
Post a Comment